The MySQL Workbench "community edition" is an open source GUI data modeling, schema design, SQL development and database admin client for the MySQL database. It allows easy point and click discovery and investigation of any MySQL database.
Oracle MySQL Workbench installation on Linux and Microsoft Windows platforms.
- Download MySQL Workbench: downloads
Linux:
RHEL 6:- Dependencies/Prerequisites:
- Pexpect: from RHEL6 Server DVD (not on the RHEL6 Workstation DVD)
/media/RHEL_6.0 x86_64 Disc 1/Packages/pexpect-2.3-6.el6.noarch.rpm - LibZip: libzip-0.9-3.1.el6.x86_64.rpm
rpm -ivh libzip-0.9-3.1.el6.x86_64.rpm
- Pexpect: from RHEL6 Server DVD (not on the RHEL6 Workstation DVD)
- Download MySQL Workbench: mysql-workbench-gpl-5.2.33b-1el6.x86_64.rpm
- Install: rpm -ivh mysql-workbench-gpl-5.2.33b-1el6.x86_64.rpm
- Start: ./sqlworkbench.sh
Microsoft Windows:
- Unzip each download.
- Start MySQL Workbench:
MySQL Workbench main screen:
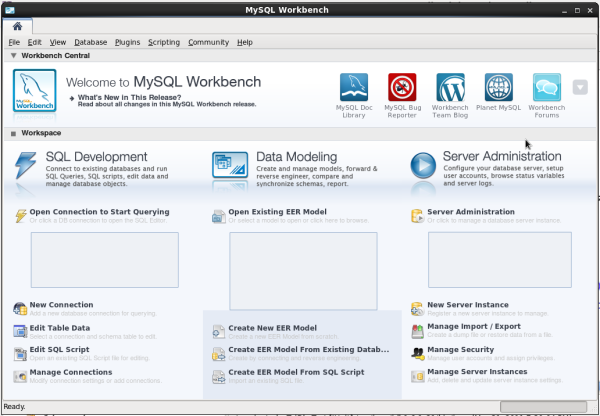
One must configure MySQL Workbench to attach to the MySQL database. MySQL Workbench allows one to store multiple DB server connections, each with their own unique configurations.
Three MySQL Workbench supported connection types will be detailed here:
- Direct Connection to port 3306 on the DB Server
- SSH Connection to the DB Server Host with a Local Connection to Port 3306
- SSH tunnel and AWS EC2 RDS
This connection is the simplest but also the least desirable as it is not encrypted.
- Configure a "New Connection":
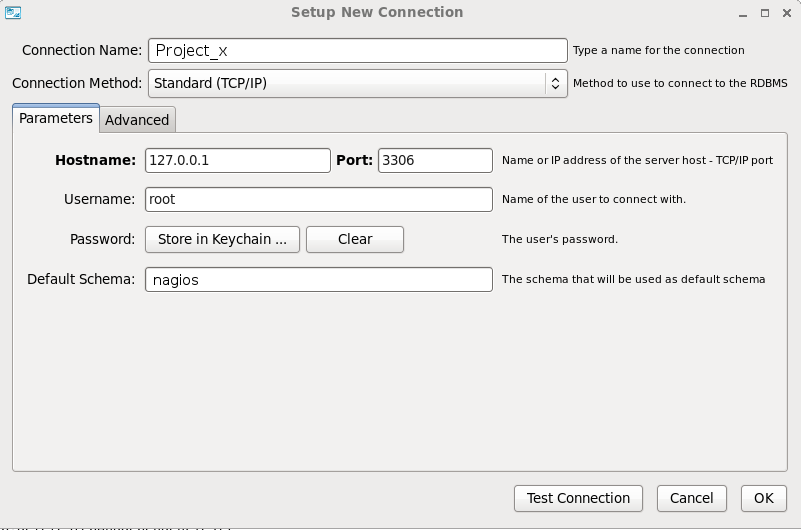
Select "File" + "New Connection":- Hostname: Be sure to assign a name to your configuration where the "hostname" is the network node name, its' IP address or "localhost" if the database is running locally.
- The port is probably the MySQL default "3306".
- Specify the login and password
- Specify the database name ("Default Schema").
Select "Store in Vault..." to enter password
- Test Connection (optional: select this button to test)

- Storing passwords (optional):
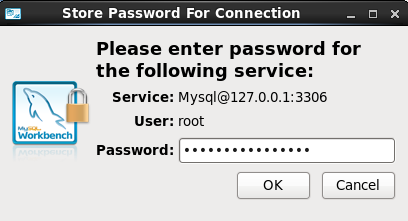
Hit OK and then "Store password in vault"
The MySQL database can be configured for remote client access by both granting remote access to the database user (all hosts "%") explicitly and the MySQL "bind-address" configuration in /etc/my.cnf.
For more see the YoLinux.com Linux and MySQL Tutorial (check out the security section to configure for remote access)
[Potential Pitfall]: Upgrade to 5.7.4 or using passwords generate in MySQL 4.1 or earlier:
The password encryption hashing algorithm was changed and thus old passwords generated with the old algorithm fail to authenticate correctly.
Backwards compatibility with the old scheme was eliminated in version 5.7.4.
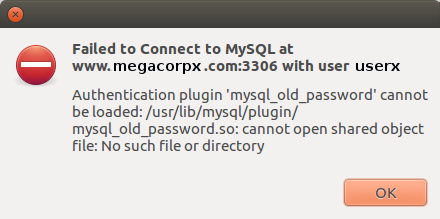
Authentication plugin 'mysql_old_password' cannot be loaded: /usr/lib/mysql/plugin/
mysql_old_password.so: cannot open shared object file: No such file or directory
Reseting the password will encrypt the password with the new hashing algorithm and authentication will work.
SET PASSWORD FOR 'userx'@'localhost' = PASSWORD('supersecretpassword');
For more details see password hashing docs
Using ssh over the network is significantly more secure and thus recommended. It does require issuing a login account on the database server in addition to database access.
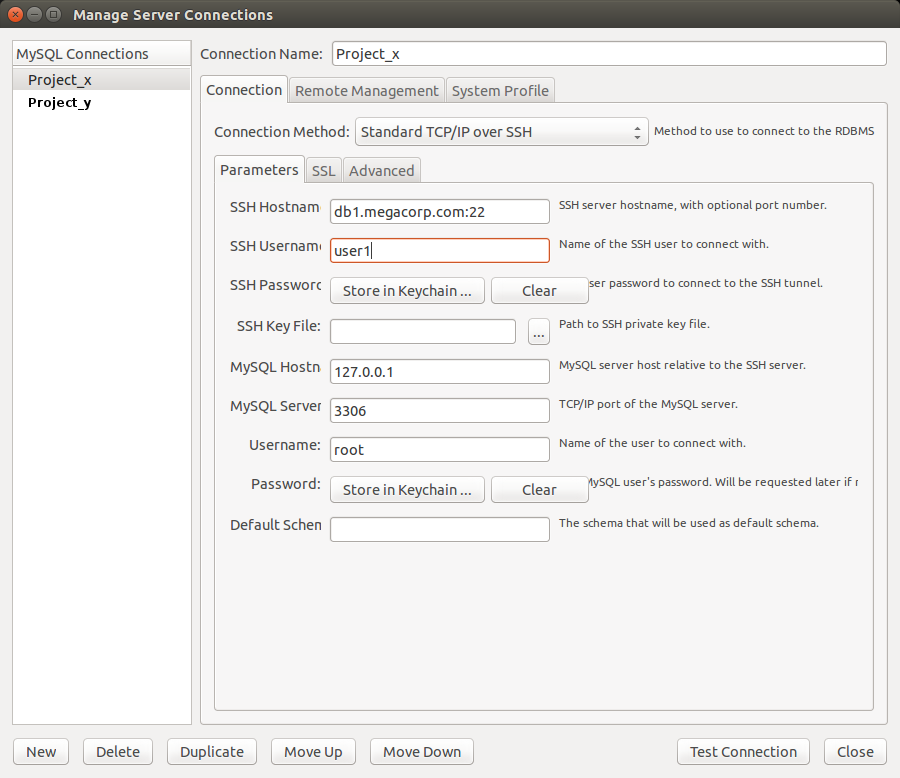
Select the "SSH Password" "Store in Keychain" button to enter the server login password.
Select the "Password" "Store in Keychain" button to enter the MySQL database login password.
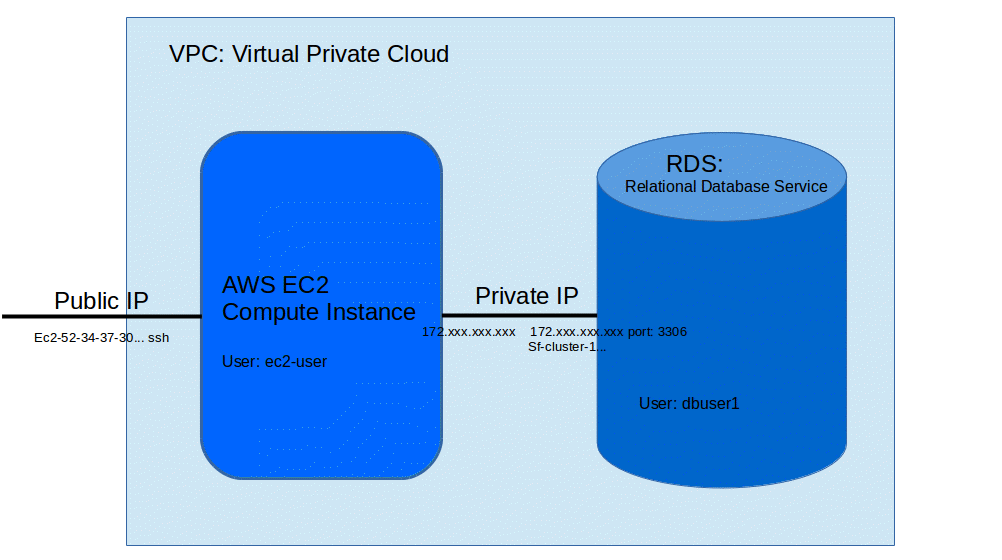
Amazon cloud configurations often include a web server (EC2 instance) and an Aurora database RDS (Relational Database Service) configured on a local VPC (Virtual Private Cloud) using non-routable local IP addresses. The web server Linux instance will typically have a public Amazon "Elastic" IP address.
Using MySQL Workbench requires a ssh tunnel connection to the Linux web server using the ssh key and public IP address and "tunneling" the connection to the separate RDS server over the private VPC network. MySQL Workbench supports this type of connection
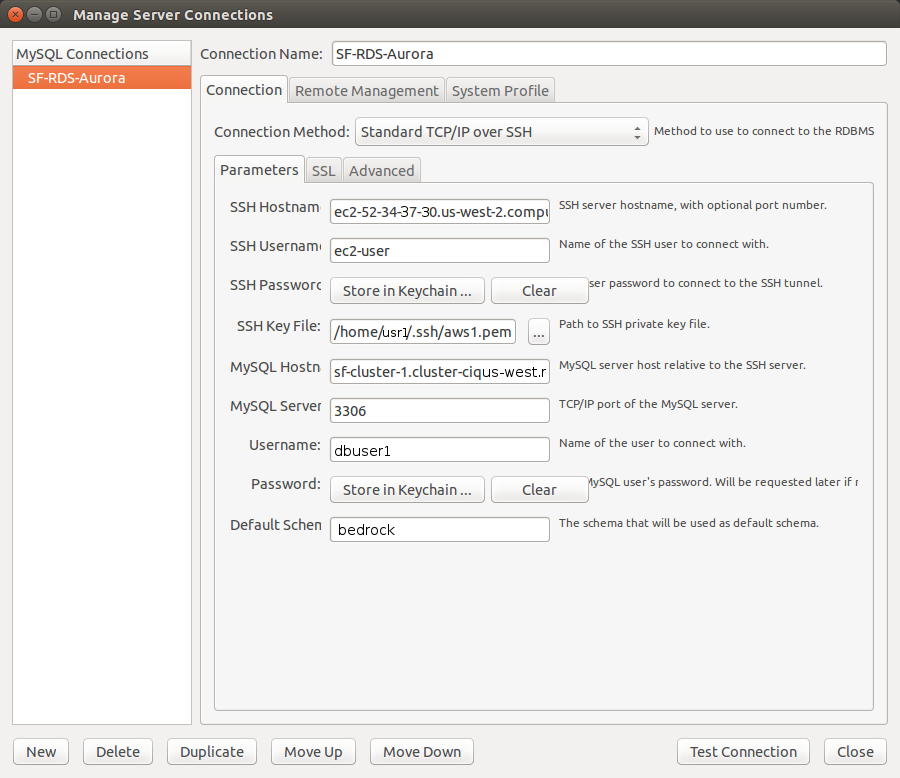
- Connection Name - Create a name to identify your connection
- Connection Method - Select "Standard TCP/IP over SSH" from the drop down list (Don't use the default: Standard(TCP/IP)). On the three tabbed pane, fill the following values found under "Parameters" tab (the other two tabs (SSL and Advanced) are not used).
- SSH Hostname - Provide the IP address or Public DNS name of the Amazon EC2 instance which will be used as the proxy to create the connection with the DB instance.
- SSH Username - Provide the login id of the Amazon EC2 instance
- SSH Password - Select "Clear" if using the ssh key to log-in
- SSH Key File - Provide the Private Key (xxx.pem) used to connect Amazon EC2 instance via SSH
- MySQL Hostname - Provide the Endpoint of the DB instance created in Amazon RDS
- Username - Provide the database Master User id of the DB instance created in Amazon RDS
- Password - Click on Store in Keychain.. button and type the password provided while creating the DB instance in Amazon RDS.
- # Reverse Engineer an existing Database
- # Generate a Database Schema Diagram from a SQL file
- # MySQL Workbench Tips
Generate a Database Schema Diagram from an existing MySQL database:
In this example we are looking at the Nagios MySQL database schema.Create and store a MySQL connection configuration as shown above.
- From the toolbar select "Database" + "Reverse Engineer ..."
Choose your "Stored Connection"
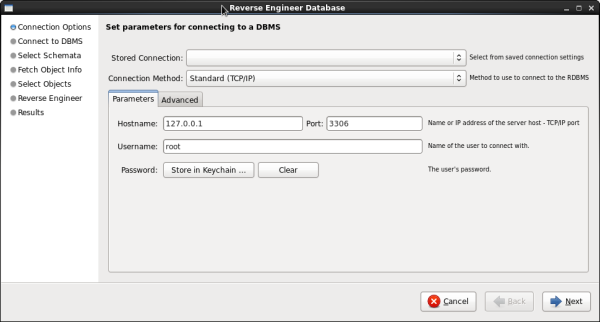
Select "Next" - A new dialog box will appear:
Select "Next" - On this dialog box select the database schema to be processed: "nagios"
(All databases which have been generated within your MySQL instance will be displayed)
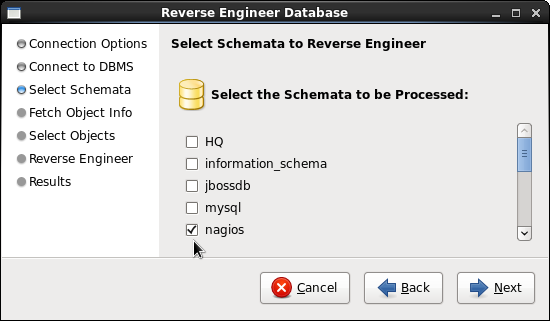
Select "Next" - The following panel appears (default options shown):
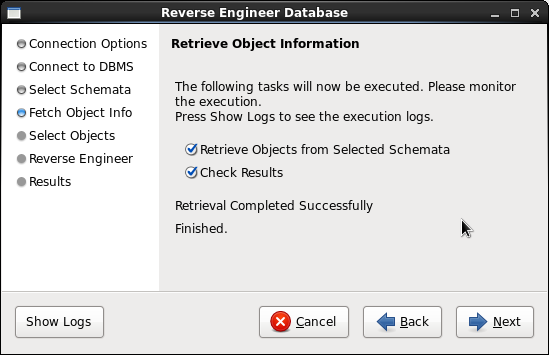
Select "Next" - The following dialog panel allows you to filter the database schema by table. The default is to select all:
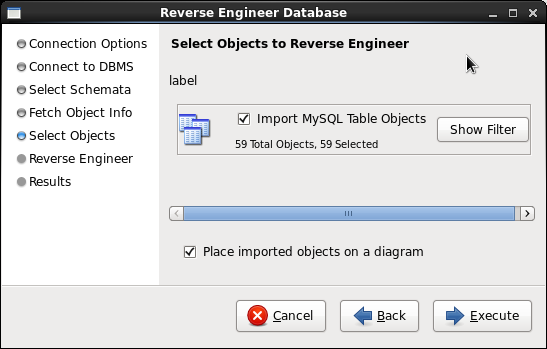
If you choose "Show Filter" this will allow you to choose which tables are displayed in the diagram.
Select "Execute" - A new dialog box will appear:
Select "Next" - A Results summary panel will display:
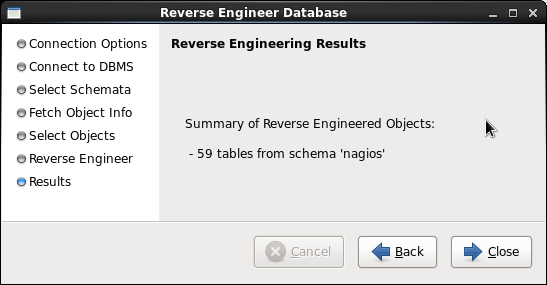
Select "Close"
You can select from the toolbar "Arrange" + "Autolayout"
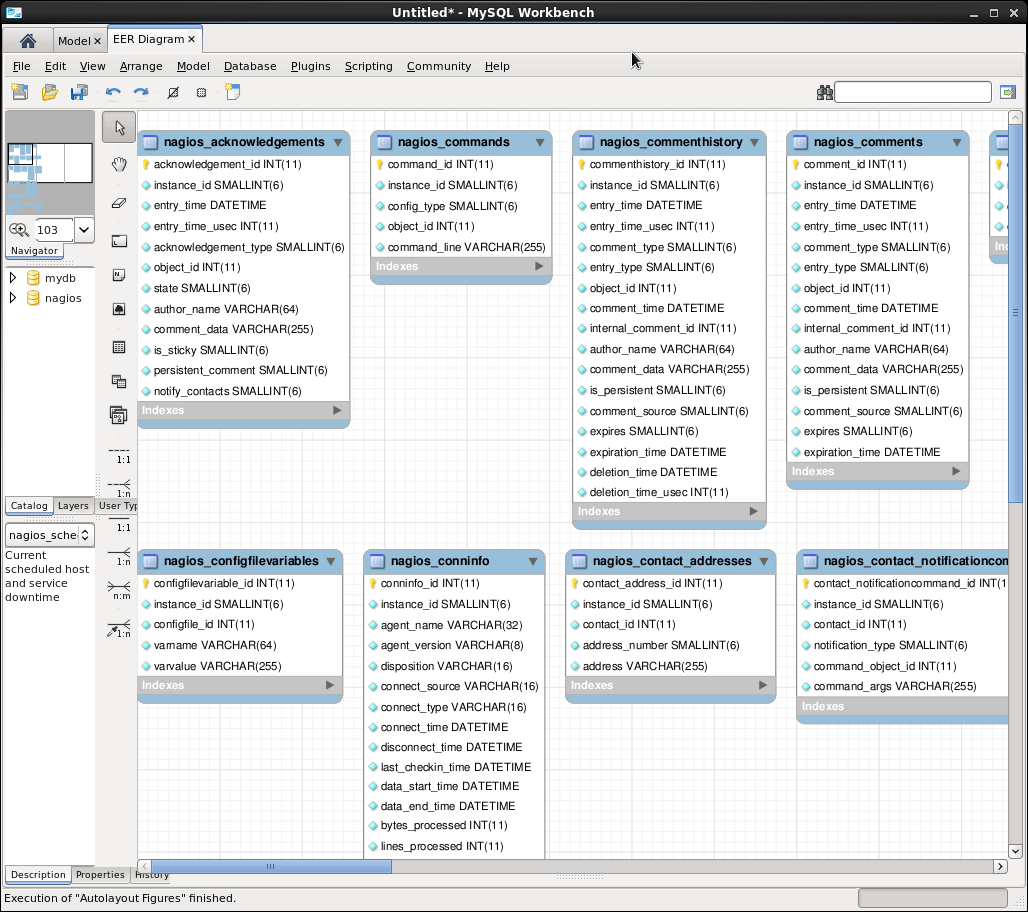
- Generate a Workbench model:
- From the toolbar:
- File + New Model
- File + Import + Reverse Engineer MySQL. Create script...
- This opens dialog box. "Browse" or enter the SQL file name. Select "Execute" button
- Select "Create EER Model from SQL Script" under the heading "Data Modeling"
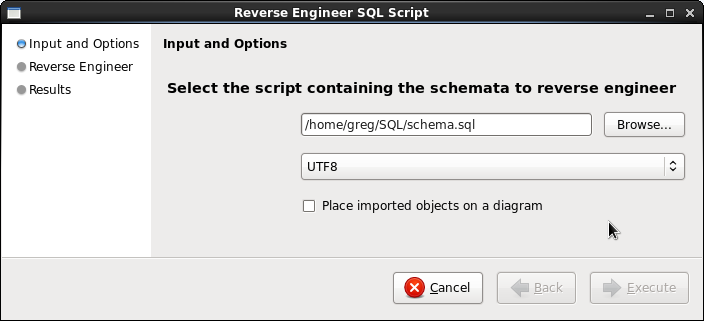
- From the toolbar:
- This action launches a new dialog box.
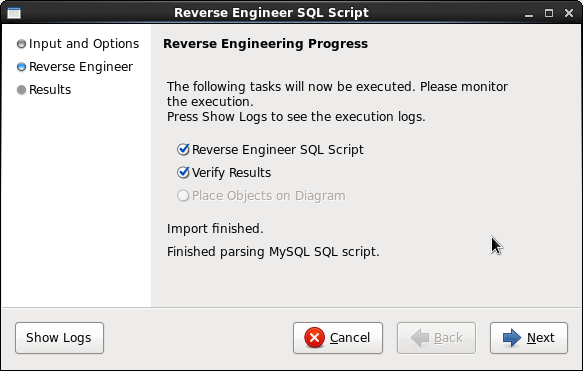
Select "Next". In the next dialog box, select "Close" - Select "Model" + "Create Diagram from Catalog Objects"
(This will generate a full data model diagram. You can now rearrange the layout for the most appropriate presentation.) - Generate image file: File + Export + Export as PNG...
Specify layout size: (required for large schema models with many tables requiring allot of space for the diagram.)
- From the toolbar select "Model"
- Select "Diagram Properties and Size"
- Set the number of pages for the layout height and width.
- MySQL Workbench Home Page
- MySQL.com:
- YoLinux.com Linux and MySQL Tutorial


 Books:
